For an aging wooden deck, preventative maintenance is a high-yield investment. A well-maintained cedar or pressure-treated deck can last 20 to 25 years, whereas a neglected one may become structurally unsound in as little as 10 to 12 years. This 1,000-word checklist provides a professional-grade roadmap for inspecting, protecting, and preserving your outdoor sanctuary.
1. The Foundation and Substructure (The “Invisible” Essentials)
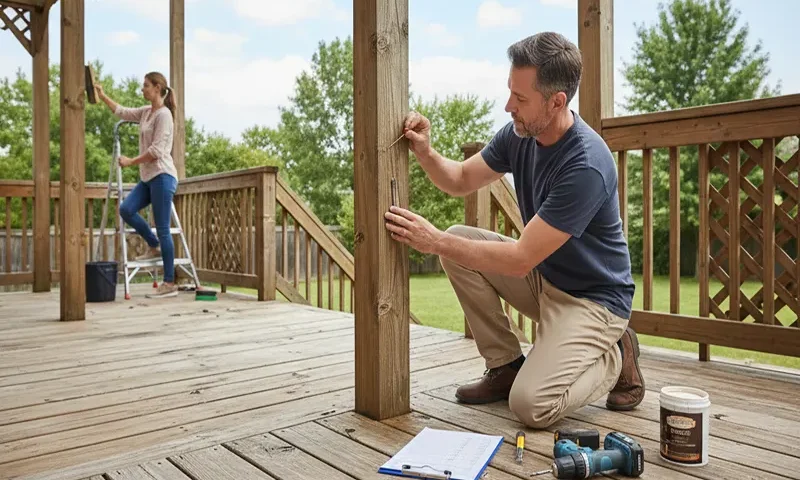
Before worrying about the color of the stain, you must ensure the skeleton of the deck is sound. This requires getting underneath the structure with a high-lumen flashlight and a flat-head screwdriver.
A. The Ledger Board Inspection
The ledger board is the most critical safety point; it is the thick piece of lumber that bolts the deck to your house.
- Tightness Check: Ensure the ledger is attached with 1/2-inch galvanized lag screws or through-bolts, not nails. Nails pull out over time, leading to sudden deck collapse.
- The Flashing Test: Look for the metal or plastic “cap” (flashing) over the top of the ledger. If water is seeping behind the board and into your house’s rim joist, the wood will rot from the inside out.
- Gap Analysis: There should be no visible gap between the ledger board and the house siding.
B. Joists, Beams, and Posts
- The Screwdriver “Pick” Test: Press a screwdriver into the base of support posts and the ends of joists. If the tool sinks in more than 1/4 inch or the wood feels spongy, you have active wood rot.
- Hardware Integrity: Inspect joist hangers and brackets. In 2026, we look for “ACQ-compatible” galvanized steel. If you see rusted, flaky metal (pitting), the hardware’s structural capacity is compromised and must be replaced.
- Post-to-Footing Connection: Ensure wooden posts sit on concrete piers above the soil line. Soil-to-wood contact is the #1 cause of post failure.
2. Safety Systems: Railings and Stairs
Stair and railing failures cause the majority of deck-related injuries. These components must be rigid.
A. The “Shake Test” for Railings
- Lateral Strength: Grab a railing post and shake it firmly. There should be zero movement. If it wobbles, the bolts at the base of the post likely need tightening or the surrounding wood has rotted.
- Baluster Spacing: Ensure balusters (the vertical slats) are no more than 4 inches apart. This is a standard safety code to prevent small children or pets from slipping through.
B. Stair Integrity
- Stringer Check: Inspect the “stringers” (the diagonal boards supporting the steps). Look for cracks along the grain or rot where the stringer meets the ground.
- Tread Security: Ensure treads aren’t cupping (curling upward), which creates a trip hazard. Replace any board that “rocks” when you step on it.
3. Surface Maintenance and Aesthetics
Once the structure is safe, you can focus on the “envelope”—the part of the deck that takes the brunt of UV rays and rain.
A. Deep Cleaning (Annual)
- Debris Removal: Use a putty knife to clear out the gaps between deck boards. Clogged gaps trap moisture and organic matter, creating a “compost” effect that rots the joists beneath.
- Chemical Selection: Avoid high-pressure washing (over 1,500 PSI) on old wood, as it can “fuzz” the fibers. Instead, use an oxygen-based bleach cleaner (Sodium Percarbonate). It kills mold and mildew without damaging the wood’s lignin or harming surrounding plants.
B. The “Water Bead” Test
To determine if your deck needs a new coat of sealant:
- Pour a cup of water on several areas of the deck.
- If the water beads up, your sealant is still working.
- If the water soaks in and darkens the wood within 60 seconds, your wood is “thirsty” and vulnerable to rot.
4. 2026 Material Science: Choosing the Right Sealant
In 2026, we have moved away from “film-forming” stains (which peel like a sunburn) toward penetrating oil-based stains.
- Semi-Transparent Stains: These provide the best balance of UV protection and aesthetics. The pigments act like “sunscreen” for the wood.
- High-Solid Content: Look for stains with high paraffin or natural oil content to replenish the wood’s internal oils, which prevents the wood from becoming brittle and “checking” (cracking).
| Maintenance Task | Frequency | Estimated Cost (DIY) |
| Sweep Debris/Clear Gaps | Monthly | $0 |
| Structural Inspection | Annually (Spring) | $0 |
| Deep Wash | Annually | $40–$70 |
| Sanding & Sealing | Every 2–3 Years | $150–$300 |
5. Environmental Micro-Management
- Furniture Placement: Periodically move planters and outdoor rugs. These items trap moisture and can cause permanent dark rot spots on the decking.
- Gutter Maintenance: Ensure your house gutters aren’t overflowing onto the deck. A concentrated “waterfall” from a clogged gutter will erode the finish of a deck in a single season.
- Ventilation: Ensure the area under the deck has airflow. If you have decorative lattice, make sure it isn’t blocked by heavy bushes, which creates a “humidity chamber” under your deck boards.
6. Knowing When to Call a Professional
If your inspection reveals any of the following, a DIY fix may not be safe:
- Widespread “Soft Spots”: If more than 20% of your joists or beams fail the screwdriver test.
- Ledger Separation: If you can see light between your house and the deck.
- Severe Sway: If the deck sways significantly when a person walks across it.
The “Small-Step” Philosophy
Preventative maintenance is about catching the 1/4-inch crack before it becomes a 4-foot split. By following this checklist every spring, you transform your deck from a ticking financial liability into a durable asset. The goal is to spend a few hours each year with a wrench and a brush so that you don’t have to spend $20,000 on a full replacement next decade.
