The promise of smart home technology often conjures images of effortless comfort and energy savings. For homeowners with multi-zone HVAC systems, this promise is even more alluring: imagine precise temperature control for every area of your home, reducing energy waste in unoccupied rooms and maximizing comfort where it counts. While the idea of installing smart thermostats in a complex multi-zone setup might seem daunting, it’s a perfectly achievable DIY project with the right guidance. This comprehensive guide will walk you through the process, empowering you to take control of your home’s climate and energy consumption.
Understanding Your Multi-Zone System
Before you even think about buying a smart thermostat, it’s crucial to understand how your existing multi-zone system operates. Unlike single-zone systems where one thermostat controls the entire house, multi-zone systems utilize a central zone controller (also known as a zone panel or control board) that directs conditioned air to specific areas via dampers installed in the ductwork. Each zone typically has its own thermostat that communicates with this central controller.
Key Components to Identify:
- Zone Controller/Panel: This is the brain of your multi-zone system, usually a metal box located near your furnace/air handler. It has terminals for each thermostat and the dampers.
- Zone Thermostats: Each existing thermostat in your home controls a specific zone.
- Dampers: These are motorized flaps within the ductwork that open and close to direct airflow. You won’t directly interact with these for thermostat installation, but it’s good to know they exist.
- HVAC Unit(s): Your furnace, air conditioner, or heat pump.
Why Go Smart? The Benefits for Multi-Zone Homes
Upgrading to smart thermostats in a multi-zone home offers amplified benefits:
- Granular Control: Adjust temperatures zone-by-zone from anywhere via your smartphone.
- Enhanced Energy Savings: Program schedules for individual zones, ensuring you’re not heating or cooling empty rooms. Many smart thermostats also offer geofencing (adjusting temperatures when you leave/return) and occupancy sensing.
- Improved Comfort: Achieve ideal temperatures in specific areas based on their usage patterns and sun exposure.
- Smart Home Integration: Connects with other smart devices like voice assistants (Alexa, Google Assistant) for hands-free control.
- Usage Reports: Gain insights into your energy consumption for each zone, helping you identify areas for further optimization.
Essential Tools and Materials
Before you begin, gather these items:
- Smart Thermostats: One for each zone you wish to upgrade. Ensure they are compatible with multi-zone systems (most major brands like Ecobee, Nest, Honeywell Lyric are).
- Screwdrivers: Philips and flathead.
- Wire Strippers/Cutters: For working with thermostat wires.
- Needle-Nose Pliers: Useful for bending wires.
- Multimeter (Optional but Recommended): For checking voltage.
- Flashlight or Headlamp: For working in dimly lit areas (furnace closet).
- Labeling Tape/Marker: CRUCIAL for marking wires.
- Smartphone/Tablet: For the thermostat’s setup app.
- Patience and a Pen & Paper: For notes and diagrams.
Step 1: Safety First – Power Down!
This is the most critical step. Locate your HVAC system’s circuit breaker in your electrical panel and switch it off. For added safety, you can also turn off the power switch directly on your furnace/air handler (it usually looks like a standard light switch). Verify the power is off by trying to adjust your existing thermostats – they should be unresponsive.
Step 2: Document Your Existing Wiring
Go to the first thermostat you’re replacing.
- Remove the Faceplate: Gently pull the thermostat’s faceplate off its base.
- Take Pictures: Take multiple clear photos of the existing wiring connected to the terminal block. Get close-up shots showing which wire color goes into which lettered terminal (e.g., Red to R, White to W, Green to G).
- Label Wires: As you disconnect each wire, immediately label it with the letter of the terminal it was connected to. This is where your labeling tape comes in handy. Do not rely on color alone, as wiring schemes can vary.
- Disconnect Wires: Carefully disconnect the wires from the terminals.
- Remove the Old Baseplate: Unscrew and remove the old thermostat’s baseplate from the wall.
Repeat this process for every thermostat you plan to replace. Consistency in labeling is key.
Step 3: Check for a “C” Wire (Common Wire)
Most smart thermostats require a continuous 24V power supply, which is provided by a “C” wire. If your old thermostat didn’t have batteries, it likely used a C-wire. Look at your photos and labels:
- If you have a C-wire: Great! Your new smart thermostat will likely connect directly.
- If you don’t have a C-wire: This is a common situation in older homes. You have a few options:
- Find an Unused Wire: Sometimes, there’s an extra, unused wire tucked behind your wall. If you find one, you can connect it to the C-terminal on your zone controller and the C-terminal on your new smart thermostat.
- Use a Power Extender Kit (PEK): Many smart thermostat brands offer PEKs (e.g., Ecobee Power Extender Kit, Nest Power Connector). These devices re-purpose an existing wire to create a C-wire connection. You’ll install this at your zone controller. Follow the specific instructions that come with your PEK carefully.
- Hire an Electrician: If you’re uncomfortable with wiring at the zone controller, or can’t find a solution, a qualified HVAC technician can easily run a new C-wire or install a PEK for you.
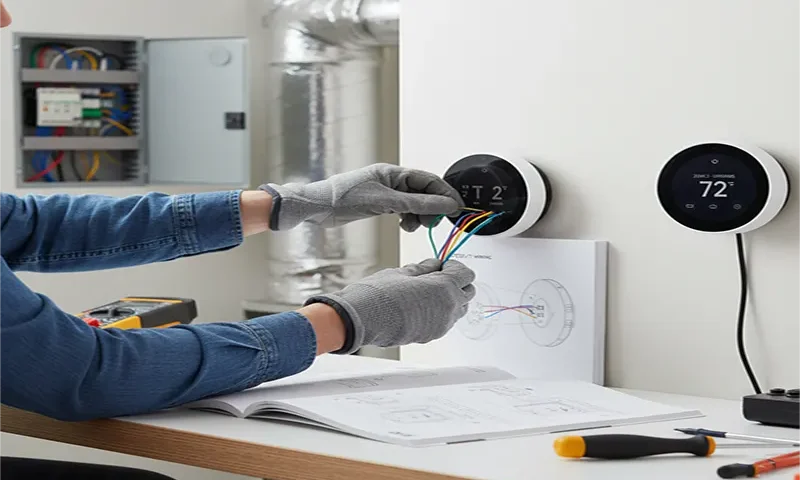
Step 4: Wire the New Smart Thermostat
Follow the specific wiring diagram provided with your new smart thermostat. While designs vary, the general principle remains the same:
- Mount the New Baseplate: Secure the new smart thermostat’s baseplate to the wall using the provided screws. Ensure it’s level.
- Connect Wires: Using your labeled wires, connect each wire to the corresponding terminal on the new baseplate. Refer to the diagram you took pictures of and the installation guide for your specific smart thermostat.
- R or Rh/Rc: Power (often Red)
- W or W1/W2: Heat (often White)
- Y or Y1/Y2: Cooling (often Yellow)
- G: Fan (often Green)
- C: Common (often Blue or Black)
- O/B: Reversing valve for heat pumps.
- Tuck Wires: Carefully push any excess wire back into the wall cavity to prevent them from interfering with the thermostat’s operation.
- Attach Faceplate: Snap the smart thermostat’s faceplate onto its base.
Repeat for all zones.
Step 5: Power Up and Initial Setup
- Restore Power: Go back to your electrical panel and flip the circuit breaker for your HVAC system back on.
- Thermostat Boot-Up: Your new smart thermostats should power on and begin their initial boot sequence.
- App-Guided Setup: Most smart thermostats rely heavily on their companion smartphone app for setup. Download the app, create an account, and follow the on-screen prompts. This typically involves:
- Connecting the thermostat to your home’s Wi-Fi network.
- Naming each thermostat (e.g., “Living Room,” “Master Bedroom”).
- Configuring HVAC system type (furnace, heat pump, etc.).
- Setting initial temperature preferences and schedules.
Step 6: Test Each Zone Thoroughly
Once all thermostats are installed and set up via the app, it’s time for comprehensive testing:
- Heating Test: For each zone, set the thermostat to “Heat” mode and raise the temperature significantly above the current room temperature.
- Verify that your furnace kicks on.
- Go to the corresponding zone’s vents and confirm hot air is flowing.
- Check that the dampers in the other zones remain closed (or that those zones are not heating).
- Lower the temperature back down after verifying.
- Cooling Test: For each zone, set the thermostat to “Cool” mode and lower the temperature significantly below the current room temperature.
- Verify that your air conditioner kicks on.
- Go to the corresponding zone’s vents and confirm cold air is flowing.
- Check that the dampers in the other zones remain closed (or that those zones are not cooling).
- Raise the temperature back up after verifying.
- Fan Test: For each zone, select “Fan On” mode.
- Verify that the fan runs independently in that zone (if your system supports independent fan control).
- Ensure the fan turns off when you select “Fan Auto.”
- App Control: Test controlling each thermostat from your smartphone app, ensuring commands are sent and received correctly.
- Voice Control (if applicable): If you’ve integrated with Alexa or Google Assistant, test commands like “Alexa, set Living Room to 72 degrees.”
Troubleshooting Common Issues
- No Power to Thermostat: Double-check the circuit breaker, the power switch on your furnace, and the C-wire connection. If using a PEK, ensure it’s wired correctly at the zone controller.
- Thermostat Not Connecting to Wi-Fi: Ensure your Wi-Fi network is active and strong enough in the thermostat’s location. Your Wi-Fi password is case-sensitive. Some older smart thermostats may only support 2.4GHz Wi-Fi.
- HVAC System Not Responding: Re-check all wiring connections, especially at the zone controller and the thermostat terminals. Ensure the correct HVAC system type is selected in the app’s settings.
- Incorrect Zone Heating/Cooling: This often points to an issue with the zone controller or dampers. If you suspect this, it might be time to call an HVAC professional.
- One Zone Works, Others Don’t: Carefully re-inspect the wiring for the non-working zones.
Smart Comfort, Smart Savings
Installing smart thermostats in a multi-zone HVAC system is a rewarding DIY project that pays dividends in comfort, convenience, and energy savings. While it requires careful attention to detail, particularly with wiring and labeling, the process is straightforward enough for most handy homeowners. By following this guide, you’ll transform your home into a truly intelligent climate-controlled environment, enjoying customized comfort while significantly reducing your energy footprint. Take your time, be meticulous with your wiring, and soon you’ll be enjoying the ultimate control over your home’s climate, right from your fingertips.
