Handling Hidden Rot Found Beneath Decking with Roof Repair Near Me

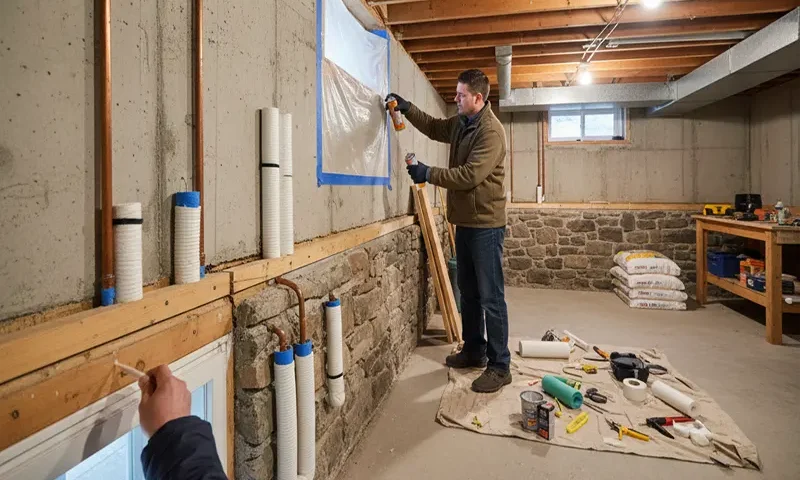
Damage beneath the roof decking often goes unnoticed until it begins affecting the structure above it. Many roofs appear solid from the outside while concealed decay threatens framing, shingles, and insulation below the surface. Homeowners searching for roof repair near me usually discover how fast hidden rot can worsen once the decking is opened.

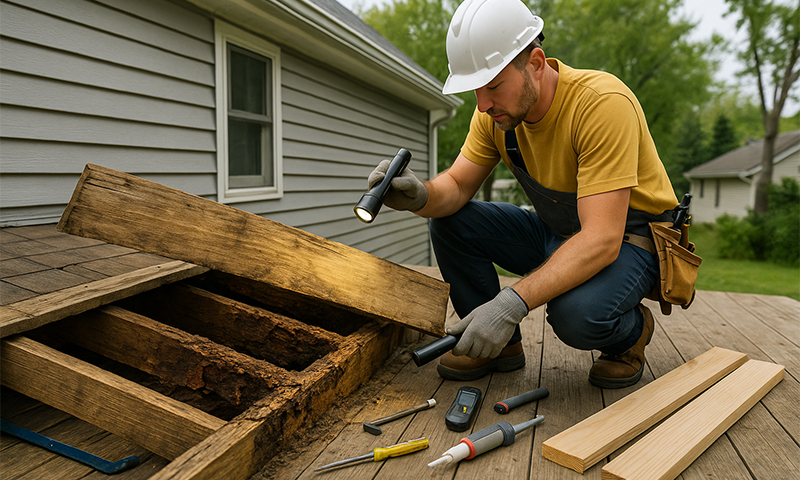
Causes of Hidden Rot Forming Beneath Aging Decking Layers

Rot usually develops in the dark, unventilated spaces between old decking and the layers above it. Moisture enters through worn shingles, lifted nails, or compromised underlayment and becomes trapped where air cannot circulate. Over time, this quiet environment allows decay organisms to thrive and soft spots begin to form.

The rate of deterioration depends on roofing age, climate, and the quality of past repairs. Small gaps or misaligned shingles often let water pass through without detection. Those searching for roofing near me often learn that unnoticed moisture … READ MORE

Cost-effective ways to seal basement air leaks for winter

1. The Critical Target: The Rim Joist and Sill Plate

The “rim joist” (or band joist) is the area where your house’s wooden frame meets the concrete foundation. It is notoriously leaky because wood and concrete expand and contract at different rates, creating gaps.

How to Seal It on a Budget:

  • Silicone Caulk ($8–$12 per tube): Use this for small cracks (less than 1/4 inch) between the wooden sill plate and the concrete foundation.
  • Expanding Spray Foam ($6–$10 per can): For larger gaps where the joists meet the rim board, use a “gap and cracks” insulating foam.
  • Rigid Foam Board ($25–$35 per sheet): Instead of expensive professional spray foam, buy a sheet of 2-inch XPS (extruded polystyrene). Cut small squares to fit into the “bays” between joists, then “seal the edges” of the squares with spray foam. This creates a high R-value barrier for a fraction of the cost.

2.

READ MORE
DIY Smart Thermostat Installation for Multi-Zone HVAC Systems: A Step-by-Step Guide

The promise of smart home technology often conjures images of effortless comfort and energy savings. For homeowners with multi-zone HVAC systems, this promise is even more alluring: imagine precise temperature control for every area of your home, reducing energy waste in unoccupied rooms and maximizing comfort where it counts. While the idea of installing smart thermostats in a complex multi-zone setup might seem daunting, it’s a perfectly achievable DIY project with the right guidance. This comprehensive guide will walk you through the process, empowering you to take control of your home’s climate and energy consumption.

Understanding Your Multi-Zone System

Before you even think about buying a smart thermostat, it’s crucial to understand how your existing multi-zone system operates. Unlike single-zone systems where one thermostat controls the entire house, multi-zone systems utilize a central zone controller (also known as a zone panel or control board) that directs conditioned air to specific … READ MORE

DIY Drywall Repair Tips for Small Holes and Cracks

Drywall, while a durable building material, is prone to damage over time. Small holes and cracks are common issues that can detract from the appearance of your walls. The good news is that with a few simple tools and techniques, you can easily repair these imperfections without the need for professional assistance. Here are some DIY drywall repair tips for addressing small holes and cracks.

Assess the Damage

Before starting any repairs, assess the extent of the damage. Small nail holes, pinholes, and hairline cracks are relatively easy to fix using DIY methods. Larger holes or extensive damage may require professional intervention. It’s important to determine the scope of the repair needed before proceeding.

Gather the Necessary Tools and Materials

For small hole and crack repairs, you’ll need the following tools and materials:

  • Spackle
  • Putty knife
  • Sandpaper
  • Paint and paintbrush

Ensure you have these items on hand before starting the … READ MORE

Step-by-Step Guide to Repairing a Broken Door Hinge

A broken door hinge can be a significant inconvenience, but with the right tools and knowledge, it can be repaired without the need for professional help. Follow this step-by-step guide to get your door hinge back in working order.

Step 1: Gather the Necessary Supplies

Before beginning the repair process, ensure that you have the following tools and materials on hand:

  • Screwdriver
  • Wood glue
  • Replacement hinge (if needed)
  • Hammer
  • Chisel
  • Sandpaper

Step 2: Remove the Door

If the door hinge is severely broken, it may be necessary to remove the door from the frame. Use a screwdriver to remove the screws from the broken hinge and carefully lift the door off the frame. Place the door in a secure and flat area to work on it effectively.

Step 3: Inspect the Damage

Examine the broken hinge to determine the extent of the damage. It is essential to identify whether the … READ MORE